
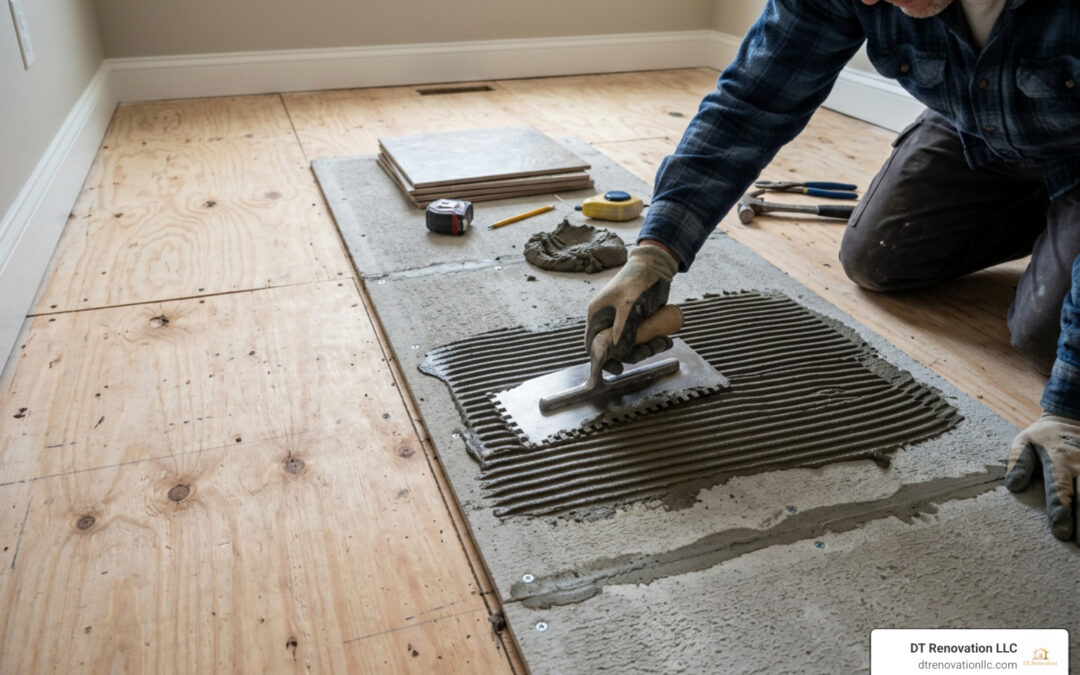
Why the Right Subfloor Makes or Breaks Your Tile Floor
Choosing the best subfloor for tile is the single most important decision you will make before any tile is set.
Additionally, Tile quality depends on that choice, so homeowners should assess options thoroughly.
Additionally, here's the short answer about Tile if you need it fast:
| Subfloor Type | Best For | Tile-Ready? |
|---|---|---|
| 3/4" APA-rated plywood | Wood-framed floors | With underlayment (backer board or uncoupling membrane) |
| 3/4" OSB (Exposure 1) | Budget builds, dry areas | With underlayment only — never tile directly on OSB |
| Concrete slab | Ground-level or basement floors | Yes, if flat and crack-free |
| Double-layer plywood (3/4" + 1/2") | Older homes, bouncy floors | With underlayment — best for stiffness |
The bottom line: No single subfloor fits every situation.
Plywood is the most reliable choice under wood-framed floors.
Concrete works well when it's properly prepared.
However, what matters most is a stiff, flat, and dry structure before any tile goes down.
Here's why this matters more than most people realize.
Up to 80% of tile cracking problems trace back to a subfloor that flexes too much or isn't flat enough — not to the tile itself or the installer's technique. A beautiful tile floor can look perfect on day one and start cracking at the grout lines within a year if the foundation beneath it wasn't built right.
That's something I've seen on renovation jobs across Raleigh, Cary, and the Triangle. A homeowner calls about cracked grout in a bathroom that was tiled only two years ago. Nine times out of ten, we pull up the tile and find a subfloor that was never rigid enough to begin with.
The good news? Getting this right isn't complicated — it just requires knowing what to look for and which materials to use.
I'm Dmytro Tkach, owner of DT Renovation LLC, and over years of remodeling bathrooms, kitchens, and flooring throughout the Triangle, I've worked through nearly every subfloor scenario imaginable — helping homeowners find the best subfloor for tile based on their specific structure, budget, and tile choice. In this guide, I'll walk you through exactly how to evaluate your subfloor and pick the right system for a tile floor that holds up for decades.
Subfloor vs. Underlayment: What’s the Difference?
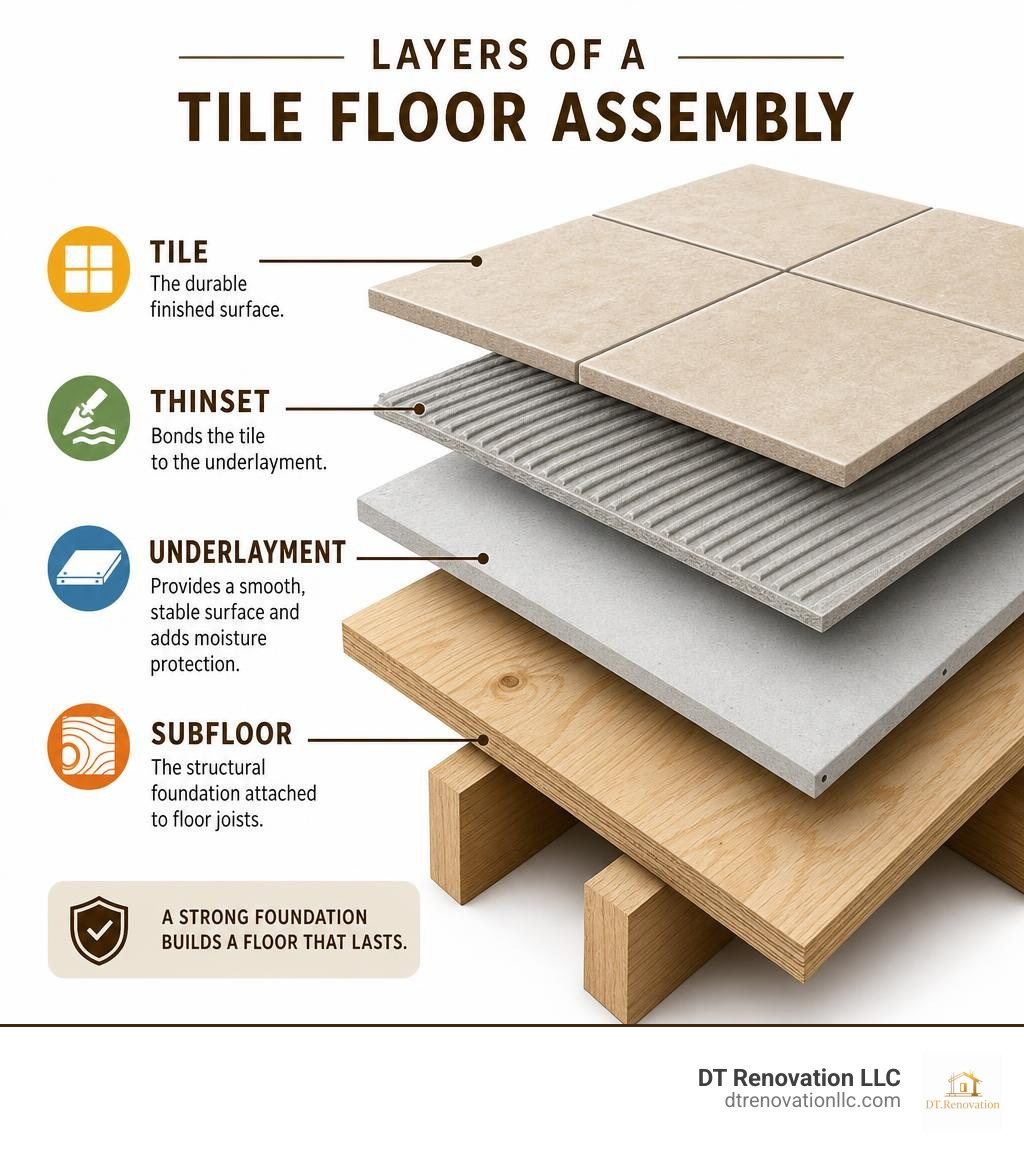
To understand how to build a floor that lasts, we have to look at the floor as a complete system. Many homeowners use the terms "subfloor" and "underlayment" interchangeably, but they serve two entirely different purposes.
The structural subfloor is the bottom layer that is fastened directly to your home’s floor joists. In most homes around Cary, Apex, and Wake Forest, this is a layer of 3/4-inch plywood or oriented strand board (OSB). Its job is to provide structural integrity, hold up the weight of your furniture and family, and span the gaps between the joists.
The underlayment layer sits on top of the subfloor, right beneath the tile. This is where we install products like cement backer board, uncoupling membranes, or fiber-cement sheets. The underlayment does not provide structural strength to keep the house from shaking, but it does create a smooth, flat, and highly stable bonding surface for your tile mortar.
Why do we need both? Wood expands and contracts with changes in humidity, while tile and grout are completely rigid. If you stick tile directly to a wood subfloor, the natural movement of the wood will shear the tile loose or crack your grout lines. The underlayment acts as a buffer, absorbing that movement so your tile stays put.
To make sure your floor is stiff enough for tile, we have to look at its deflection limits. Deflection is a fancy word for "bounce" or "flex." For standard ceramic and porcelain tile, the industry standard is a deflection limit of L/360. This means that under a full load, the floor should not bend more than the length of the span (L) divided by 360. If you are planning a high-end natural stone installation, the standard is even stricter at L/480 because stone is much more brittle than porcelain.
If you want to read more about how different flooring materials handle wear and tear, check out our guide on Top Flooring Options for Homeowners in 2025: Pros and Cons or browse our Category: Flooring pages for inspiration.
Finding the Best Subfloor for Tile: Wood vs. Concrete
When it comes to selecting the best subfloor for tile, your starting point is almost always determined by your home’s existing architecture. In the Triangle, we generally work with two main types of subfloors: wood frame joists or concrete slabs.
| Feature | Wood Subfloor (Plywood/OSB) | Concrete Slab |
|---|---|---|
| Flexibility / Bounce | Higher risk of deflection; must be evaluated and reinforced | Zero deflection; excellent for heavy stone and large-format tiles |
| Moisture Sensitivity | Highly sensitive; requires waterproofing in wet areas | Can wick moisture from the ground; requires moisture testing |
| Preparation Needs | Requires an underlayment layer (backer board or membrane) | Needs to be flat within 3/16" over 10 feet; may require self-leveling |
| Best Underlayment Pair | Cement board or uncoupling membrane | Liquid anti-fracture membrane or uncoupling sheet |
If you are working on a concrete slab, your primary focus is flatness and moisture control rather than structural flex. Concrete does not bounce, but it can settle, crack, or wick moisture up from the ground. Before tiling over concrete, we always verify the slab meets the flatness standards outlined in the Tile Underlayment Options and Selection Guide | National Tile Authority . If there are dips or humps, we have to grind them down or fill them in before proceeding.
For wood-framed floors, we must ensure the joist spacing and subfloor thickness can support the weight of the tile assembly without bending. If your joists are spaced 16 inches on center, a single layer of 3/4-inch plywood is the standard starting point. If they are spaced 24 inches on center, you will almost certainly need to add a second layer of plywood to prevent sagging between the joists.
Wood Subfloor Requirements: Plywood vs. OSB
If you have a wood-framed floor, you are likely looking at either plywood or OSB. While both are engineered wood products, they perform very differently under a tile floor.
Why Plywood is Often the Best Subfloor for Tile Over Wood Joists
Did you know that 70% of tile projects in the U.S. now use APA-rated plywood subfloors? There is a good reason for this. Plywood is constructed from thin layers of wood veneer glued together in alternating directions. This cross-grain construction gives plywood excellent stiffness and dimensional stability.
Plywood also handles moisture much better than OSB. If a pipe leaks or water spills in a bathroom, plywood will swell slightly but will dry out and return to its original shape and thickness once the moisture is gone. For the top layer of a wood subfloor, experienced installers often reach for a 5/8-inch thick CDX grade or APA-rated plywood.
When installing plywood, leaving a 1/8-inch expansion gap at all panel edges and between sheets can slash warping risks by 40%. Wood needs room to breathe and expand; if you butt the sheets tight against each other, they will push against one another and buckle, creating a hump in your finished tile floor. To ensure maximum stiffness, we always recommend the glue-and-screw method: apply a high-quality construction adhesive to the joists and drive screws every 6 inches along the edges and every 12 inches in the field. This method increases floor stiffness by up to 70% compared to fasteners alone.
For more details on plywood specifications, grades, and structural repairs, you can refer to the Plywood Subfloor: Thickness, Grade, Installation & Repair Guide (2026) - D and G Flooring .
How to Prep OSB to Achieve the Best Subfloor for Tile
OSB is made of small wood strands packed together and bonded with wax and synthetic resins. It is a highly popular material for modern home building because it is uniform, lacks natural knots, and is generally more budget-friendly than plywood.
However, OSB has one major weakness: its edges. When OSB gets wet, the edges swell significantly and do not shrink back to their original size when they dry. This can create permanent ridges along the seams of your subfloor, which will quickly cause your tiles to crack or lift.
If your home has an OSB subfloor, don't panic. You can still install a beautiful tile floor, but you must take extra precautions:
- Ensure the OSB is rated Exposure 1, which means it uses waterproof glues designed to withstand temporary moisture during construction.
- Never install tile directly over OSB.
- You must install a high-quality underlayment layer — such as a cement backer board or an uncoupling membrane — over the OSB to isolate the tile from the wood's movement.
Choosing and Installing the Right Underlayment
Once your structural subfloor is flat, stiff, and secured, it is time to choose the underlayment. The global market for flooring underlayment is set to hit USD 5.8 billion by 2032, driven by products that stop cracks before they start. A quality underlayment can extend a tile floor’s life by up to 50%, making it a smart investment for any remodeling project.
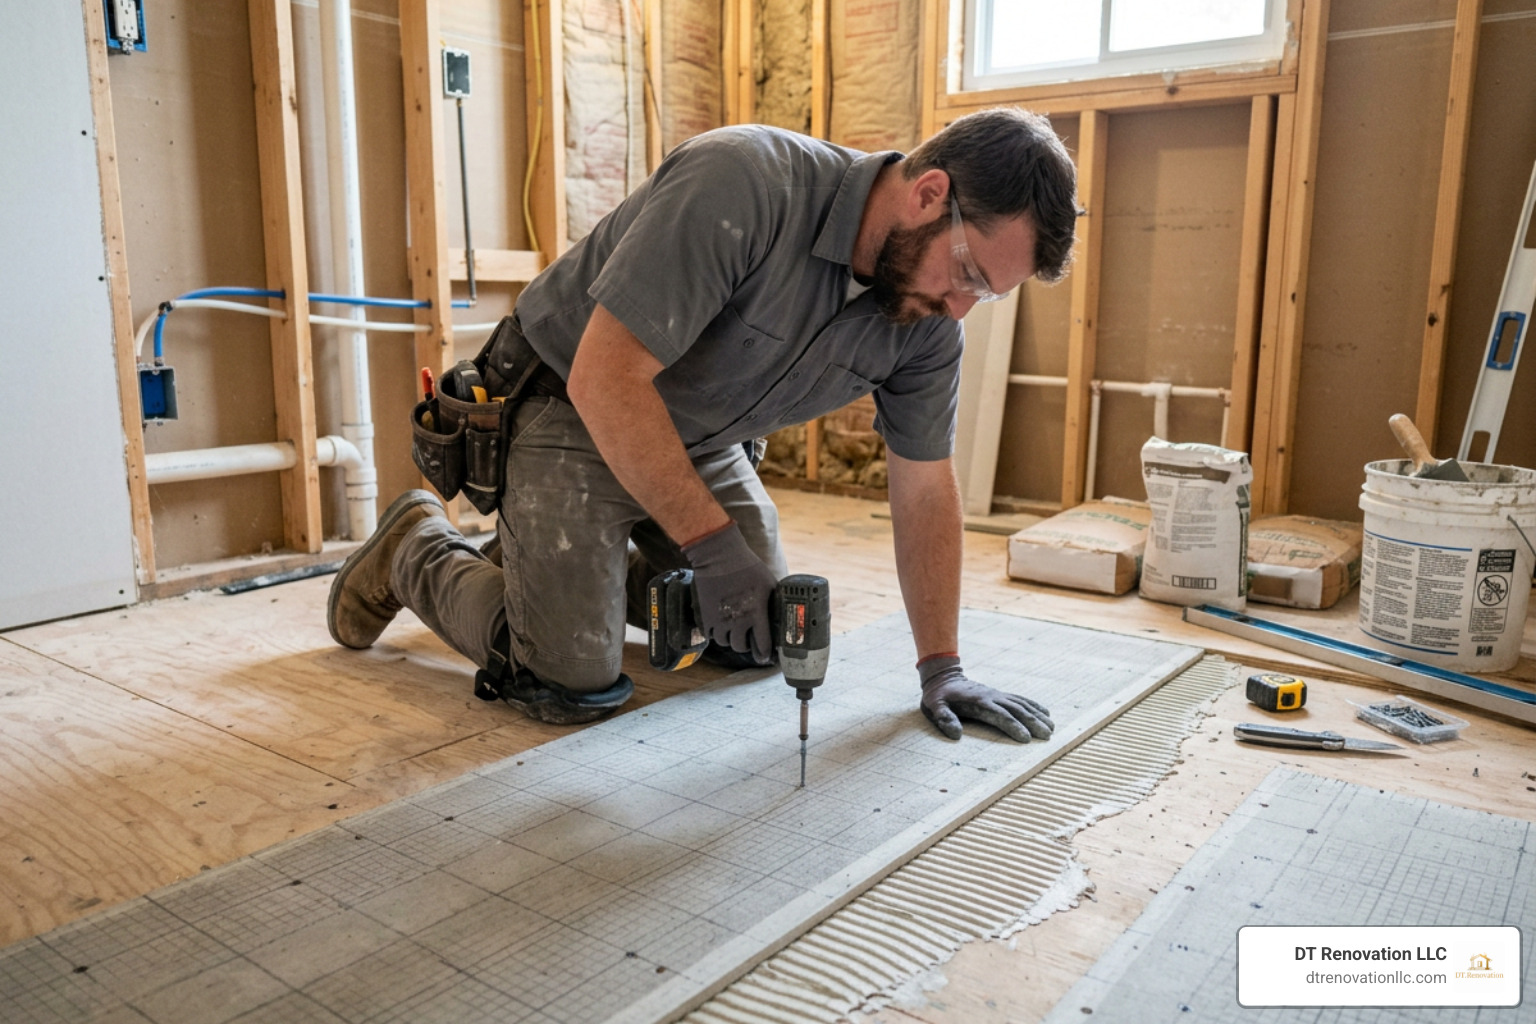
There are two primary underlayment options for wood subfloors:
1. Cement Backer Board (CBU)
Cement board (such as Durock or HardieBacker) is the traditional, time-tested underlayment for tile. It is completely unaffected by moisture and provides a rigid, gritty surface that thinset mortar bonds to beautifully.
- How to install it: You must trowel a layer of modified thinset mortar over your wood subfloor before laying down the cement board. This mortar bed fills any tiny voids between the wood and the backer board, preventing air pockets that could allow the floor to flex. Once the board is set in the wet mortar, secure it using specialized corrosion-resistant screws spaced every 6 to 8 inches. Finally, tape the seams with alkali-resistant fiberglass mesh tape and thinset.
- Best use cases: Great for budget-conscious projects, standard-sized ceramic tiles, and wet areas like walk-in showers.
2. Uncoupling Membranes (e.g., Schluter Ditra)
Uncoupling membranes are made of high-density polyethylene (HDPE) with a fleece webbing on the underside. They feature a unique grid structure of square cavities.
- How it works: The fleece on the bottom bonds to your subfloor with thinset, while the tile is set directly into the plastic cavities on top. If the wood subfloor shifts or expands horizontally, the fleece and plastic grid absorb that shear stress, preventing the movement from transferring to the rigid tile above.
- Pros and Cons: Uncoupling membranes are lightweight, incredibly fast to install, and provide excellent waterproofing and vapor management. The only downside is cost — they typically run 2 to 3 times more per square foot than cement backer board.
- Best use cases: High-traffic areas, large-format tiles, radiant heated floors, and open-concept layouts.
For a deeper dive into uncoupling systems, check out the Ditra Underlayment Guide: Benefits, Installation, and Expert Tips | ThePlywood.com or read our comprehensive Tile Installation Guide: Tools, Costs, and How to Find the Right Contractor in Raleigh, NC to see how we plan these installations.
Preparing Concrete Subfloors for Flawless Tile
Tiling over a concrete slab sounds simple because concrete is rock-solid. However, concrete presents its own set of challenges. Concrete shrinks as it cures, which can create hairline cracks. If you tile directly over these cracks, they will telegraph right up into your tile and grout.
Before laying tile on concrete, we check for flatness. The industry standard requires a concrete floor to be flat within 3/16 inch in a 10-foot radius.
If the slab has dips, low spots, or a rough finish, we use a high-quality self-leveling underlayment (SLU). Products like USG Durock™ Brand Self-Leveling Underlayment Multi-Use Submittal Sheet (English) - CB516 are fantastic for this. We clean the concrete, apply a specialized primer to prevent the concrete from sucking the water out of the wet leveler, and then pour the self-leveling compound. It flows into the low spots and cures to a perfectly flat, smooth surface.
To handle cracks in concrete, we use a crack isolation membrane or an uncoupling sheet. If the slab has non-structural shrinkage cracks, applying a liquid-applied or sheet-based crack isolation membrane over the crack will prevent those movements from cracking your new tile floor.
Best Practices for a Squeak-Free, Crack-Free Installation
If you are tackling a subfloor installation yourself, keeping these best practices in mind will save you from major headaches down the road. You can also find excellent visual demonstrations in the Overview: Preparing your Subfloor for Tile - Home Depot Videos to see these principles in action.
- Stagger Your Seams: When laying down a second layer of plywood underlayment, never align the seams with the subfloor layer underneath. Offset the joints by at least 2 inches (and ideally more) to distribute loads evenly.
- Leave Expansion Gaps: Always leave a 1/8-inch gap between all plywood sheets and a 1/2-inch gap around the perimeter of the room where the floor meets the walls.
- Sister Your Joists if Needed: If you walk across your floor and notice a significant bounce or sag, the issue might be with your floor joists. We can reinforce these joists by "sistering" them — bolting and gluing a second piece of lumber alongside the existing joist to double its strength.
- Never Use Drywall Screws: Drywall screws are brittle and will snap under the shear forces of a shifting floor. Always use high-quality, corrosion-resistant wood screws or ring-shank nails.
For a step-by-step breakdown of wood subfloor preparation, check out the guide on How to Install Tile Floor on Wood Subfloor (Without Cracking or Lifting) - Symboleo: Design Your Dream Home or read How to Install a Subfloor for a Flawless Tile Foundation .
Frequently Asked Questions About Tile Subfloors
Can you lay tile directly on a plywood subfloor?
No, you should never install tile directly onto a standard plywood subfloor. While specialized polymer-modified thinset mortars meeting ANSI A118.11 can technically bond to exterior-grade plywood, the wood will still expand and contract with humidity changes. This movement will eventually break the bond, causing your tiles to tent, crack, or lift. Always use an approved underlayment (like a cement board or uncoupling membrane) over your plywood.
How thick should a subfloor be for ceramic or porcelain tile?
For standard 16-inch on-center joist spacing, the Tile Council of North America (TCNA) recommends a total wood subfloor assembly thickness of at least 1-1/8 inches. This is typically achieved by having a 3/4-inch tongue-and-groove subfloor as the base, topped with a 1/2-inch exterior-grade plywood underlayment or a 1/2-inch cement backer board.
Do I need a waterproof membrane under bathroom floor tile?
Yes, especially in wet areas like bathrooms, laundry rooms, and kitchens. While tile and grout are water-resistant, they are not waterproof. Water can seep through grout lines and saturate your wood subfloor, leading to rot and mold. Applying a liquid waterproofing membrane (meeting ANSI A118.10 standards) or using a waterproof uncoupling membrane like Schluter Ditra is essential to protect your home's structure.
Partnering with a Professional for Your Raleigh Tile Project
Preparing a subfloor is hard, dusty, and highly physical work. It requires specialized tools, a deep understanding of structural engineering, and precise execution. If a subfloor is even slightly uneven or bouncy, the entire tile installation is compromised.
At DT Renovation LLC, we take the guesswork out of your flooring projects. Whether you are remodeling a master bathroom in Cary, updating a kitchen in Wake Forest, or installing large-format porcelain tile in your Apex home, we handle every step of the process with the highest level of craftsmanship.
We serve homeowners throughout the Triangle, including Raleigh, Cary, Apex, Durham, Chapel Hill, Morrisville, Wake Forest, Holly Springs, Hillsborough, Garner, and Knightdale. We focus on transparent communication, detailed planning, and honest recommendations to deliver beautiful, functional spaces that increase your home's value.
Ready to start your next flooring project? Explore our Flooring Installation services or contact us today to schedule a consultation. Let's build a foundation that lasts a lifetime!